How to Make a High-Resolution Logo for Print
Learn what a high-resolution logo is, vector vs raster, and how to create one. Get print-ready exports at 300 DPI and the right formats.
What is a high-resolution logo?
A high-resolution logo is a logo that stays sharp when you resize it or place it in print. That means clean edges, readable lines, and accurate colors at different sizes. Many people search “what is a high resolution logo” because they want one file that never looks blurry.
For print, sharpness usually depends on two things. First, whether the logo is vector-based or raster-based. Second, whether your raster exports meet print needs like DPI (dots per inch).
A practical way to think about it is this. If your logo can scale from a business card to a banner without pixelation, it is working the way you expect.
Vector vs raster: what actually changes your logo quality
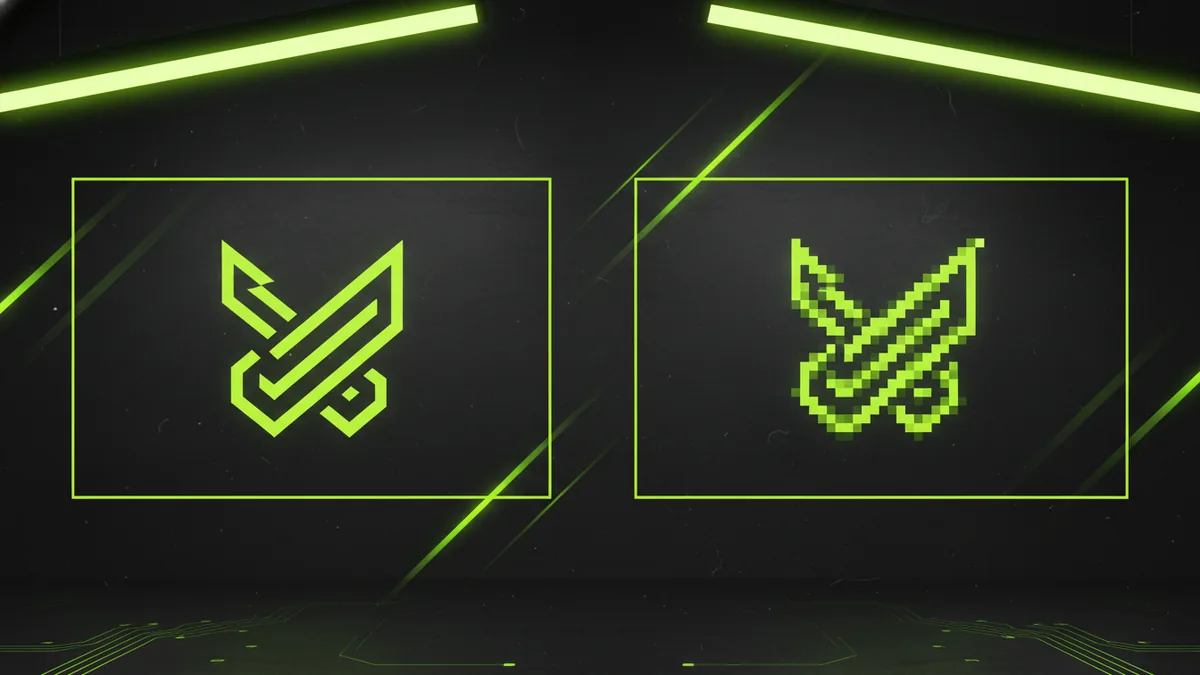
Vector graphics are made from paths and points. When you scale a vector logo up or down, the shapes redraw cleanly. That is why vector images are the default choice for logo design.
Raster images are made of pixels. When you enlarge a raster logo, the pixels spread out and details look soft. This is the common failure mode behind “how do I create a high resolution logo” when someone starts with a low-resolution PNG.
Here is a quick comparison you can use when choosing how to build or export your logo.
| File type | Made of | Resizing quality | Best for |
|---|---|---|---|
| Vector (AI, EPS, SVG) | Paths and points | Stays crisp | Print and web at many sizes |
| Raster (PNG, JPG, TIFF) | Pixels | Can blur when enlarged | When a vendor asks for pixels |
If you have the choice, start with vector. Then export raster versions for specific uses like thumbnails or print files that require pixels.
Software options for creating high-res logos
You can make a high-resolution logo with both paid and free graphic design software. The key is whether you can work in vectors, not just whether you can save a “big” image.
Common options include Adobe Illustrator and CorelDraw. For free alternatives, Inkscape is a popular choice and can open and edit many vector file types.
If you are learning, you may wonder “how to make a high res logo in illustrator.” The answer is to build the logo with vector shapes and paths, then export at the right settings for raster output.
- Adobe Illustrator: strong vector tools, easy export control for print.
- CorelDraw: robust vector editing for branding and layout work.
- Inkscape: free vector workflow for creating logos and exports.
Also keep in mind tracing techniques. If you only have a low-quality bitmap, you can sometimes redraw using vector tracing. But you should treat tracing as a starting point, then clean the paths by hand for best results.
Steps to create your logo for maximum clarity
Start your process with sketches before you move into digital tools. This reduces revision churn and helps you decide which details matter at small sizes. A logo must work at both 24px and 24 inches, so early thinking saves time later.
Next, choose a clear layout: mark, wordmark, or both. Decide where line thickness must stay consistent. Then build the shapes in vector form, using simple geometry wherever possible.
When you are creating, keep these build rules in mind. They directly affect whether your logo will look sharp in print and on packaging.
- Refine the sketch to a clean form with clear edges and spacing.
- Create the vector artwork using shapes and paths, not stretched pixels.
- Check stroke and spacing so thin lines do not disappear when printed.
- Test small sizes by previewing at thumbnail scale for legibility.
- Lock your master and keep editable layers for later exports.
If you are working from a rough draft, avoid “recreating” by scaling up a blurry image. Instead, redraw the logo as vector. That is the reliable path to “how to create a high resolution logo” that holds up over time.
Saving and exporting high-resolution logo files
Once your logo looks right in vector, export it into formats that match each use case. Your print vendor might want a specific raster export, but you still want to keep your master vector file for future resizing.
For print, a common target is at least 300 DPI for the raster exports. DPI (dots per inch) is how printers map pixels to physical size. If you export a small image at a low DPI, the printer cannot add missing detail.
Here is how to translate that into a simple workflow. Keep a vector master, then export raster files at the intended print size and DPI. If the vendor needs 2 inches wide, export it so it meets 300 DPI at that width.
- JPG: useful for photos, but logos often prefer PNG or TIFF for cleaner edges.
- PNG: supports transparency and crisp edges for many logo uses.
- GIF: rarely needed for print, but can work for simple web uses.
- TIFF: common for high-quality print workflows.
Also save multiple sizes for convenience. For example, one set for small web use and one set for print placements. This reduces back-and-forth with vendors and avoids “fix it again” delays.
Best practices for logo design that stays high-res
The best way to ensure your logo stays high resolution is to design it for scalability from the start. That means consistent stroke behavior, balanced spacing, and a shape system that does not rely on a single bitmap. People often ask “what resolution should a logo be” because they want one number.
In practice, use resolution settings for your exported raster files. Use vector for the master artwork. Then match exports to the physical size the logo will print at, with 300 DPI as a safe baseline for print-ready raster output.
Finally, build your logo kit so you are never stuck. Save a master vector file, plus common exports for vendors and platforms. This is how to make a high resolution logo in illustrator without painting yourself into a corner.
- Keep an editable master in your main vector format.
- Export transparent PNG versions for overlays.
- Export print-ready TIFF or PNG at 300 DPI.
- Use consistent color profiles when exporting for print jobs.
- Avoid tiny details that vanish at small sizes.
If you want a single file that “just works,” your vector master is the best start. Then use exports for each specific need.
With this workflow, you can answer “how to make a high res logo” in a way that actually holds up. Your logo stays sharp in print, scales cleanly, and stays flexible for future branding.
Frequently asked questions
- What is a high-resolution logo?
- A high-resolution logo is one that stays clear at different sizes. For print, that usually means a vector master and print-ready raster exports.
- What resolution should a logo be for print?
- A common target is at least 300 DPI for raster exports. The exact pixel size depends on the physical dimensions your printer needs.
- How do i create a high resolution logo from a low-res image?
- Redraw it as vector rather than scaling it up. You can use tracing as a starting point, then clean and refine paths.
- How to make a high res logo in illustrator?
- Build the logo as vector shapes and paths, then export for print or web. Keep the editable master file and export raster versions at the required DPI.
- What file formats should I save for logo use?
- Save a vector master for future edits. Also export PNG for transparency and TIFF or PNG for print workflows when vendors request raster files.
Related reading
How to Make a Business Logo: Tools, Tips, and Final Files
Step-by-step logo design: free tools, phone workflows, and final export tips.
How to Make T Shirt Logos: From Idea to Print-Ready Art
Learn how to make t shirt logos, from idea to print-ready design.
How to Create Animated Logo Videos for Free (No Skills Needed)
Create a polished animated logo video for free with online tools.